#ides1262 2021 week4
Explore tagged Tumblr posts
Visit Tumblr Blog
Explore Tumblr blogs with no restrictions, modern design and the best experience.
Last Seen Tumblr Blogs


Fun Fact
Tumblr was attacked by a cross-site scripting worm deployed by the Internet troll group GNAA on Dec 3, 2012.
Text
Week 4 Studio Tutorial – Perspective Drawing
🤣🤣Every time I thought it was the thorniest exercise ever, the new coming-up tasks always break up my memory in last week. No pain/failures, no gain, perhaps. In general, during this week, I am indulged in drawing different perspectives, distinguishing the numerous details between terminologies, and making comparisons with orthographic drawings. It was awesome and I have a lot of hilarious tales to share this week.
Part 1: Construct a 2 point perspective view of your chamfered box
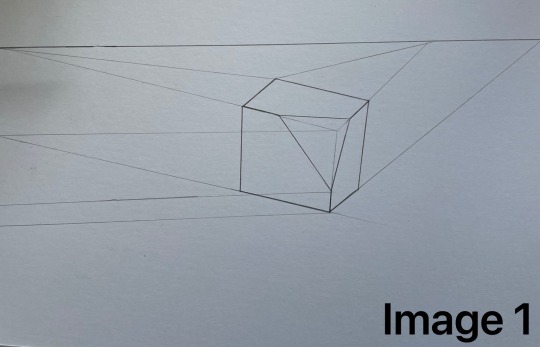
Before the class, we prepared to make the chamfered model(image 1)and commenced reading the interactive website, to have a general understanding of what is a perspective drawing. However, to utilize methods down to the ground need patience and carefulness.

For me, it was a sad and funny story. I failed three times😭 and always happened at the end after tracing.
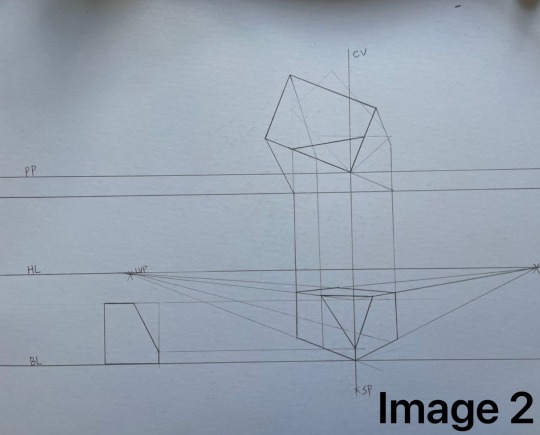
Initially, at the last moment in the tutorial, by showing to Robert, the lines from the station point were not parallel(image 2). A mistake was buried from the beginning.
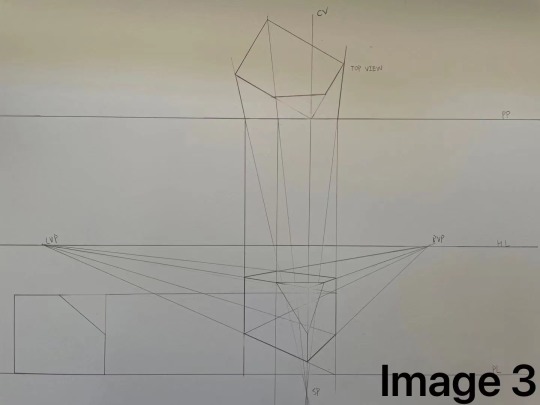
Secondly, although I realized the problem, after taking a snap😑, I forgot the rules of carefulness totally, where LVP did not locate to the right position(image3). Having a snap just like a phone restored factory settings.
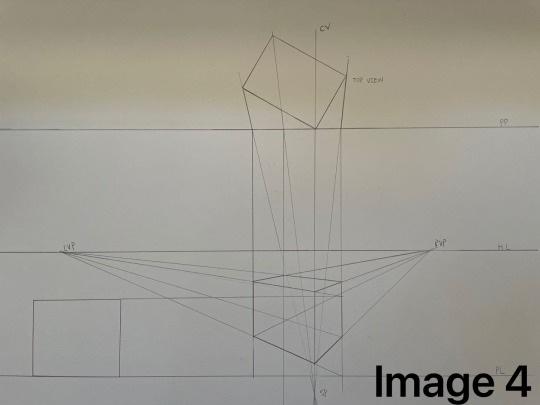
Thirdly, the vanishing point really ‘vanished’, luckily, the new page could be added together. Fortunately, things come to the end(image4). What I learned is a well-known sentence ‘No Success Chance, No Failure to Be Destined!’.
If I have the chance to do it again, I will double-check over the line weight and the page layout, and take notes down about things to change before relaxation, so that problems will not be made twice again.

Part 2. Extending a box in perspective /Part 3. Drawing circles in perspective
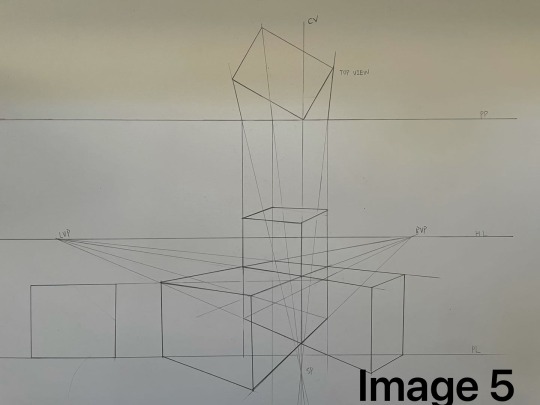
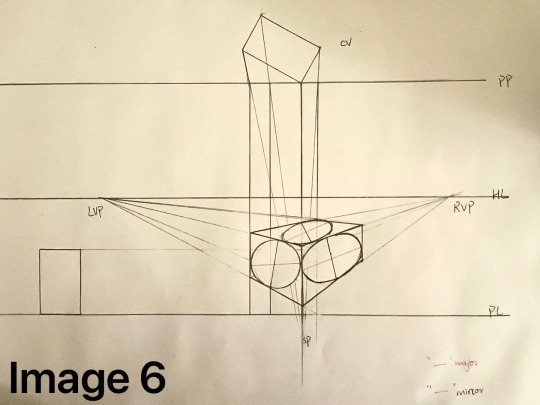
Certainly, by developing such deep insights from part 1, I went through the second(image5) and the third exercise(image6-7) quite smoothly, without any trouble. Overall, a radical system of perspective drawings was constructed, not only depicting things we see, but also it was possible to extend, subdivide, and adding circles inside. Always, a sense of achievement and gratification grows up.


19 notes
·
View notes
Photo
WEEK 4 Reflection
At first, I saw this when I see this exercise, I think it is very easy, because the perspective is the most basic part of sketch, is I have been learning, even in the last term we had also been involved in a simple perspective, at that time, I had a simple browsing the interactive reading, I think it looks very easy to implement. But when I really try for the first time I have no drawing according to the steps in the reading, but with the naked eye, I soon found out that my LVR and the RVR is wrong, the four lines are not intersect at one point, the second time, I was wrong for the pp and the distance between the pl three line hl, makes the graphic looks very strange, Not scientific, not like the graphics I see in reality, so for the third time, I carefully drew 3 parallel lines with an interval of 10 centimeters to ensure that I left enough space for the side view, and then step by step in accordance with the content of the reading and lecture to complete, soon made progress, and completed the first exercise.
The second part of the exercise was conducted on the basis of the first, hesitation I failed many times in the first practice, practice for the second time I again according to the first practice experience, when I enlarge the other three surfaces, make it into a small cube, I find it very interesting, guides the reserve that I finished this soon.
In the third part of this exercise, I still drew the figure with the same precision as in the first and second parts, and then drew the ellipse on the three surfaces. However, due to the space angles I left, I found it too difficult to draw a perfect ellipse. I used many tools, but it was still not perfect. The ellipse made me realize that I didn't have a complete grasp of perspective, and I couldn't tell how the shape of the ellipse was affected by the Angle.
If I have time to do this exercise again, I will definitely pay attention to the use of line weight, because this time when I take the picture, I find that my lines are not clear enough, which makes my cube not clear enough. Besides, I should also spend more time to practice my ability to draw an ellipse on an irregular surface.
4 notes
·
View notes